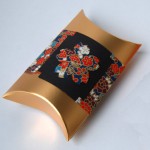
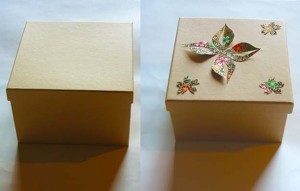
Creative Gift Boxes and Holders
Many people purchase dry foods or toiletry products to store at home, and most of these products are packed in cardboard boxes of different shapes and sizes. Generally, after the product is removed, the box is discarded or placed in a recycling box.
Putting things into recycling facilities is a good step for the environment, but one can also use their creativity to revamp or reuse these items. A simple way to reuse these boxes is to use it as a storage box, a holder for small items, or even decorate as a unique gift box.
To begin, check around your home for any items that could be used as decoration. Remeber to use your imagination and creative eye, because many things that we throw away or recycle can actually be used for something new.
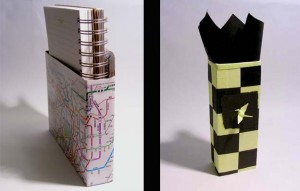
I will show you how to reuse two different boxes (one from dry foods and one from a facial product) and combine them with other materials from home. I will also use some of my leftover chiyogami or washi from previous projects. Most of the decorative paper I use are very small pieces, since I’m what most would call a “pack rat”, and have boxes filled with decorative paper from past gifts, calendars, posters, magazines and even flyers with nice colours or designs.
First step is find a piece of decorative paper large enough to wrap the entire box. If you only have small scraps, it’s simple to collage or create a mosaic design over a box. I’ll show both methods with two different boxes.
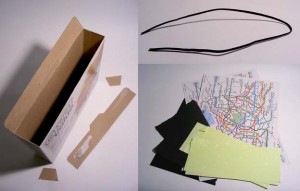
For these two projects, I’ve found the following items:
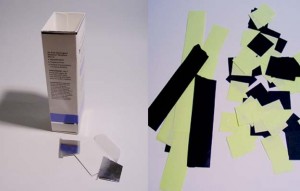
- One snack bar cardboard box
- One facial cream box
- Three scrap pieces of black paper
- Three to four pieces of scrap washi (japanese paper) in a light green colour
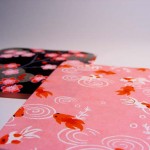
- Two colourful train maps
- One black twist tie from old packaging (approximately 30cm long) – string or ribbon will work as well.
To put everything together, I also have scissors, double-sided tape (but you can use regular tape, glue or homemade adhesive), hole punch, a pencil and ruler.
Making a Paper Holder:
This is one of the simplest projects for a practical item you can use at home or at work.
- Take a cardboard box that’s long enough to hold letters, bills or any other small bits of paper in it.
- Cut all of the flaps from the open end. If you prefer, leave one of the longer flaps on and that will become the back of the box.
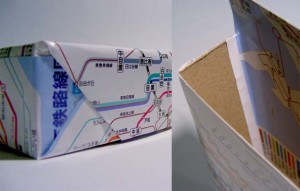
- Here, you can either wrap the box as you would a gift, but just leave the open end free, or cover each face/panel separately. To hide the joint areas, use colourful/decorative tape or even stickers.
- At the top, tuck the excess paper into the open end of the box and secure with an adhesive. If you left the top flap, simply wrap the paper over it and secure with adhesive.
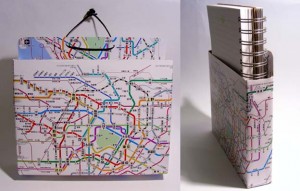
- Now, if you would like to hang the box, punch a hole through the back flap or back area – either one hole in the middle or two holes spaced apart from the middle. Depending on the box length, separating the holes at least 5cm would be good.
- Finally, you can use any other materials to further decorate your box
Making a Mosaic/Collage Pen Holder or Gift Box:
This project is also very easy, but will take a little more time.
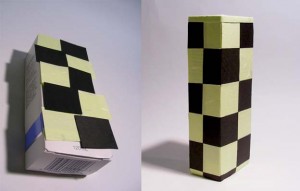
- Take any paper you would like to decorate your box with. For a nice effect, use one solid coloured paper and one patterned one or two different solid colours.
- Next, cut out strips or squares from the paper -roughly judge how much paper will be needed to cover the entire box and add a few more.
- Then, arrange the pieces in a pattern that you like – either arrange them to create a picture of a flower, tile alternating colours or randomly chosen pieces are fun too.
- Secure the pieces with an adhesive all around the box until it’s completely covered.
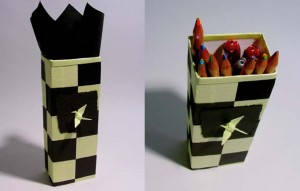
- Once that is complete, you can add any other details or decorations that you like. Origami is a simple way to add a three dimensional embellishment.
- If you would like to seal the box, you can purchase them in craft stores. If you have white glue, add a little water and that should also work well.
Once it’s done, place anything you like inside, or, wrap a gift with tissue paper, place it inside with a bit sticking out of the opening, then tie with a ribbon.
Washi and Chiyogami for Scrapbooks and Photograph Storage
Throughout the year we celebrate special occasions with our good friends and loved ones.
We watch little ones grow, celebrate birthdays, weddings, fun holidays and capture each memorable moment with a photograph to keep forever.
Some of us may store these photographs in a simple envelope, photo album, scrapbook, or in a traditional box of keepsakes, while others may happily display them around the home or work.As the years go by, those memories become more and more valuable and safe storage is very important, so that the captured memories really can last a lifetime.
One of the best papers to use for storing, decorating, sending or displaying photographs is Japanese Washi and Chiyogami paper.
The traditionally made washi uses purified water and natural plants and fibres which makes it acid free. This not only makes it the best paper to use for storage and protection, but also offers a lovely look and texture to compliment photographs, rather than overtake them.
There are fine and delicate washi that allow light to pass through it. This creates a very lovely look when framing a photograph. All you have to do is cut the paper at least 2 centimetres wider than all the sides of the picture and secure it to the back so that the excess juts out as a frame. Once that is complete, place it on a window or safely in front of a light source, such as a tealight or lamp.
Other types of washi are thicker and have varied textures that can add a bold compliment to images.
To protect all of your pictures, even if they are stacked in a box, simply place one sheet of washi between each photograph, then wrap one long sheet over the entire stack and tie with a string.
Chiyogami is fantastic for decorations since it’s carefully painted with an array of stunning colours and patterns. The colour selection for chiyogami paper is unbelievable and durability can’t be beat. Even though it’s light as a feather, it can be used like fabric, even when wet.
Covering or decorating storage boxes, picture frames, envelopes and using it as scrapbooking paper truly adds a special touch and shows how important the photos are.
If Chiyogami seems like it’s too flashy to use in great amounts, try using it as a touch of colour.
One very simple way is to cut out shapes or silhouettes( animals, flowers, objects etc…) and attaching them to neutral washi paper or directly onto plain picture frames, photo albums , boxes, and even the photos themselves.
One thing to remember is to make sure to use acid free adhesives when attaching the paper directly on the photographs. If you are still worried about adhesives, try simple origami. There are thousands of origami folding techniques that can be done simply to make lovely add-ons for decoration, without using glues or tape to attach them on. Search online for keywords like origami page markers or simple origami decorations, this will give you endless ideas as well as step-by-step instructions.
The page markers are my personal favourite since they are simple and add a sweet touch.
How to embellish a plain box in under 5 minutes
To decorate a plain box, all you need is a few pieces of decorative paper, adhesive and scissors (pencil optional).
- First, start off with some decorative paper that you like, or think would match your box nicely.
- Next, Draw out (or print off) a silhouette of an image. It can be anything you like, flowers, animals, machines…
- Then, cut out the silhouettes from your decorative paper.
- Finally, arrange the cut outs however you like on the box and secure with adhesive. *hint* I personally like to add depth to projects, so I tend to secure a small spot on the cut out and curl or lightly fold some of the pieces up to give it a more 3D effect.


