Published Online! *^_^*
Thank you to all who have been supporting me through my shop, blog and my articles!
I’ve published a few articles through ezine and have gotten a great response -especially for kirigami and my article about the benefits of origami for children.
If you’ve missed out on them, or would love to read the benefits of origami (at least to find more excuses to play with it), please check it out when you get a chance.
Origami—A-Great-Way-to-Train-Fine-Motor-and-Cognitive-Skills
Handbag with inner pocket how-to
Hello everyone!
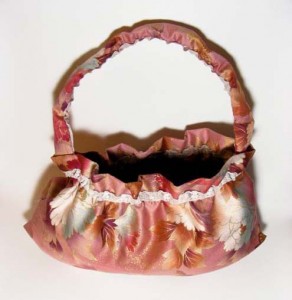
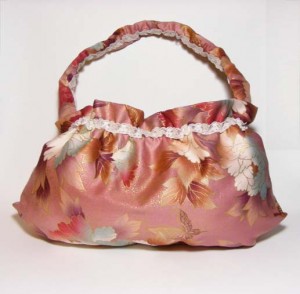
I hope you enjoyed my last handbag posts. I’ve decided to try somthing new since I still had a lot of leftover fabric, so I decided to make a handbag for my mother’s birthday *^_^*
I generally love to figure things out for myself, so I didn’t have patterns or even a clear idea of how this would look.
Here’s a brief how-to to show you how I made it:
Materials:
* one large rectangular piece of fabric
* one smaller rectangular piece of fabric for the pocket
* a long narrow piece of fabric for the handle (or find a nice ribbon that compliments the fabric)
* thin ribbon for decoration
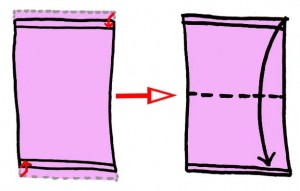
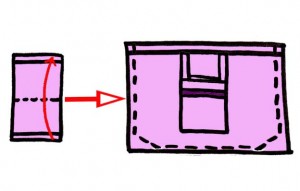
Step 1: Find a rectangular piece of fabric and hem the ends. Fold it in half.
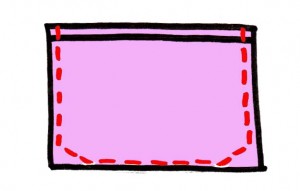
Step 2: Sew along the sides (following my red dotted line), making sure to leave the hemmed ends open at the top.
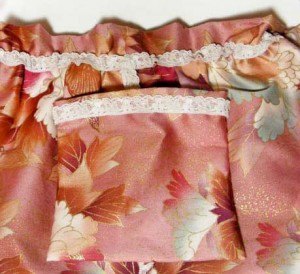
Step 3: Taking the smaller piece of fabric, hem the ends, fold in half and sew along the edges (make sure to leave the opening with the hemmed ends!)
If you would like, add two little straps and sew the top of the straps to the seam of one side of the handbag -this will ensure the stitches will not be visible from the outside.
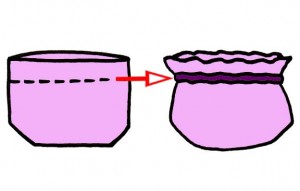
Step 4: Turn the bag inside out and sew a ribbon to the seam all the way around. Here you have the option of keeping the ribbon flat, or lightly hand sew and bunch up the fabric to give it a more romantic look.
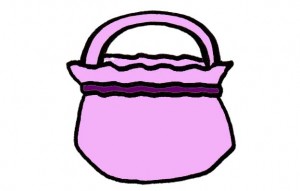
Step 5: Add a handle by sewing the long fabric to the ends (I made a tube, flattened it, and bunched it like the main handbag) but you can also use a nice ribbon.
Pretty much done! What do you think?
I thought it came out quite cute…..I’ll have to make one for myself later!
Kamishibai – Japanese Story Boards
Kamishibai are fantastic story boards used mostly for children. Unlike regular story books, these are large boards with full colour images on the front, and the writing on the back.
Last year, I taught at a number of daycares throughout Tokyo and other areas. The children loved kamishibai stories, and asked me if I had any english ones to show them. Naturally, I didn’t have any and finding english version ones in Tokyo would be very difficult and expensive, so I decided to make my own.
Here’s an example of my Halloween Story of a kitten’s halloween adventure:
I find kamishibai very fun and practical to read to children, since you can clearly show the images while comfortably sitting back and reading from the back – no more trying to angle your head to read the story and blocking the view of some children!
White Day in Japan
Happy White Day Ladies *^_^*
In Japan, Valentine’s Day is celebrated February 14th and White Day is celebrated March 14th.
Generally Valentine’s Day is celebrated with romance and presents -mainly from men to women. In Japan, Valentine’s Day is the time women give men chocolates or cakes that they make and decorate themselves (but of course there is a HUGE variety of ready made things for purchase as well).
As a “thank you” or counter appreciation, the men give marshmallows or sweets to the ladies in March.
Of course it’s a brilliant marketing from the confectionery companies…..but with so many stunning delights available, I won’t complain!
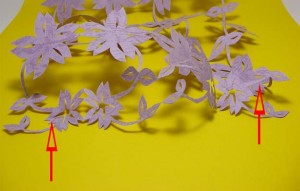
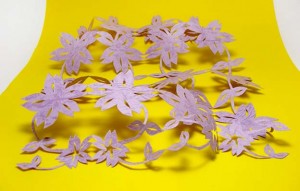
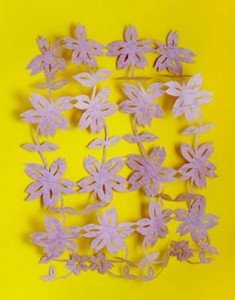
Kirigami Pop-Up – Strings of Sakura
While my excitement of the upcoming sakura season continues, I’ve decided to try a new kirigami pop-up project.
I think it turned out pretty good and it gave me a lot of ideas for different uses.
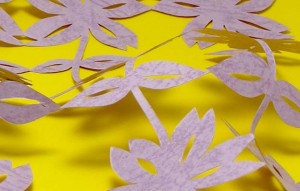
If you would like to make you own kirigami “curtain”, simply follow the steps (if you would like to see close-ups, just click on the picture!).
First, get a pretty piece of paper. I chose a slightly patterned and textured one of medium weight.
Next, fold it in half lengthwise.
Then, fold it in half lengthwise again. (This will give you a quarter of the width from the original).
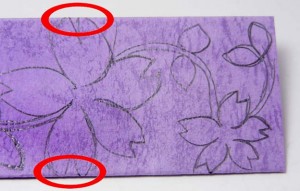
From this point, draw out any design you would like, but just make sure to have the image connected to the folded edge at least a couple of times to keep all sides connected. For a better look, please click the picture.
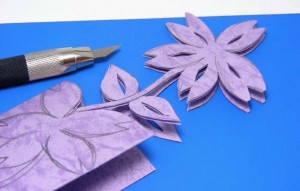
Once you’re happy with your drawing, begin cutting it out with a scalpel type knife and self healing mat.
Scissors and regular exacto knives are fine if you have large simple cuts to make, but if you would like more detail, I suggest getting a scalpel type for better control.
Take your time when cutting out your image, with small connecting sections, it’s easy to cut through them when rushing.
If you do happen to cut through the wrong line or the edge, see if you can alter the image a little or just keep working with it -sometimes mistakes end up great!
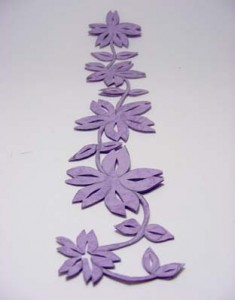
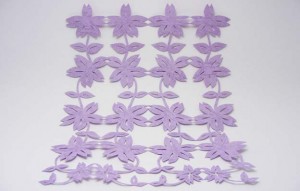
Now that it’s all cut out and cleared, open up your creation!
At this point, feel free to secure it to a dowel or bamboo pole and hang as a curtain, or use a ribbon to weave through the gaps like I did with my last kirigami post.
If you would like to create another pop-up creation like my pop-up butterflies, then follow the next steps:
Find a bright contrasting piece of paper, or card, book, box -or anything else you’d like to decorate.
Arrange your kirigami anywhere you like and play around with it. I took two corners and started to slowly twist them in opposite directions to see how the flowers would pop up and arrange themselves.
Secure one corner then twist and secure a few other points in the way that makes you happy.
Now that your pop-up is done, you can frame it in a box frame, hang it as pop-up wall art, or up on a ceiling with some of the flowers hanging down.
Soon the Season of Flowers Arrives
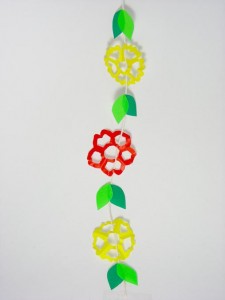
It’s a beautiful day and I felt like making something a little more fun for the lovely season that’s just around the corner. Since I have already shown you how to make a kirigami sakura, we can all elaborate this kirigami craft by combining several flower styles that can easily be incorporated into a cute mobile that can quickly add a touch of spring in your home.
I opened up a new pack of mini origami and got an idea for a mini kirigami creation.
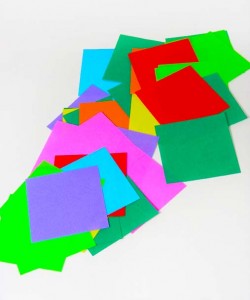
By altering the main sakura design, many different flowers can be created. I tried altering it a little for each colour to create a fun bouquet or floral mix.
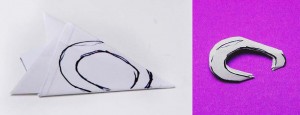
Here is one style:

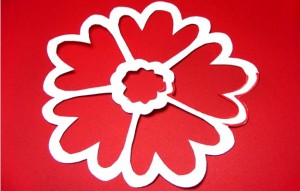
Here is a second:


Here is the third one:


and finally the fourth:

Once the flowers are cut out, it’s easy to string them by weaving the string or ribbon through the gaps in the flower. If you would like to keep the string’s visibility minimal, just glue it to a point at the top and bottom.
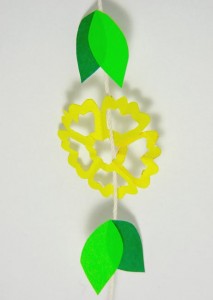
To cut very simple leaves, just take two complimenting shades of green and cut out an almond or teardrop shape. Layer the lighter shade over a portion of the darker one, and it’s done.
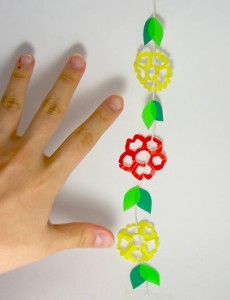
Combine as many colours as you like and make several strings of flowers. Once you have a few strings, you can make fun mobiles, window or wall hangings, or even a curtain of strung flowers.
Please leave a comment below to let me know what you think!
Sakura Mizuhiki
Mizuhiki is so versatile for almost any project. I personally love to decorate my table settings and home with it.
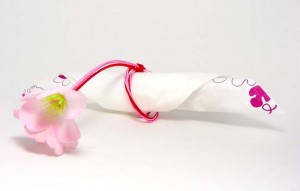
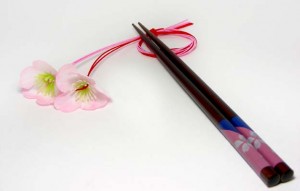
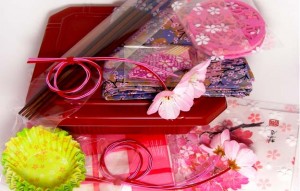
I have finally posted my hanami(cherry blossom viewing) picnic sets and added these pretty sakura mizuhiki to help dress up your party.
It’s a lovely colour combination with sakura blossoms at the tips.
You can pretty much use them for anything you like. I chose to use them as napkin holders and hashi (chopstick) rests.
Sakura Hanami Sets Are In!
I have been waiting so long to post this for all of you!
As I’m sure many of you may have already guessed…..I absolutely LOVE hanami season in Japan.
The cherry blossoms are stunning, the weather is lovely, and there’s a happy feeling in the air from everyone around, or, it’s just me who’s in a dream-like happy state. There are so many things going on, and so many sights to see. For example, one year I went out for a walk in a park and happen to find this:
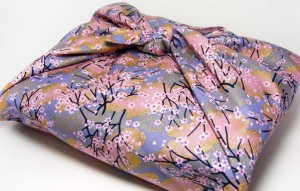
To bring the Japanese hanami experience to you, I’ve created a fun picnic set for friends or a special someone for a romantic dinner under the blossoms or under the stars.
Hanami in Japan
Hello everyone!
My apologies for the delay in posts, but I’ve been sick in bed and slowly recovering.
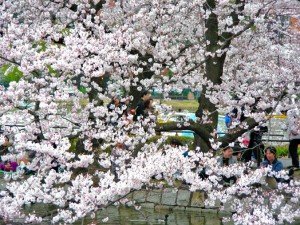
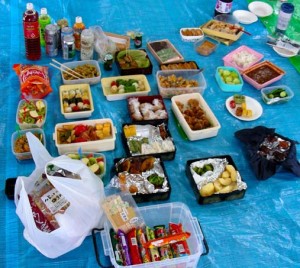
For your enjoyment, I’ve posted a few pictures from previous hanami(cherry blossom viewing) picnic celebrations in Tokyo. Please click on the images for a larger view.
I absolutely love hanami season in Japan. The warm weather, blue skies, bright sun, and stunning cherry blossoms overflowing from the trees. A truly beautiful time in Japan.
I love sakura (cherry blossom) so much that my profile picture, shop logo and one of my tattoos are of sakura!
The other good thing about the hanami picnics -delicious food and drinks!
I’m counting down the days for the season to arrive, but for the moment, we have early plum blossoms to bring a little colour.
My current view…..I was lucky to snap a photo to describe Tokyo for you: blossoms, a train, a salaryman (japanese business man) and a modern building. That’s half of Tokyo for you right there!
Soon I’ll post my hanami picnic sets so you can enjoy a hanami picnic with a loved one.
Sakura Season is just around the corner
My favorite season in Japan is spring. It’s the start of the cherry blossom season and a time for picnics and fun!
To spread my joy of the season, I’m creating a beautiful set that will be shown within the next week!


