Guest Post How-to: Gift Bags from SAY
Tired of those plain ole, mass produced gift bags? Then make your own gift sack or purse using these simple instructions.
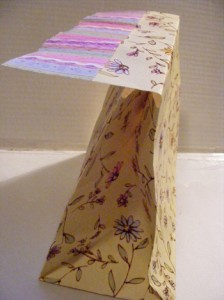
1) Take any gift bag and either cut off the handles (if rolled paper) or untie and pull them out (if ribbon or rope).
2) Choose which side will be the front then cut bag along the folds and across the “back” about 4 inches down (or however long) you want. This will become the front “flap.”
3) Discard excess and fold over the longer part to create the flap.
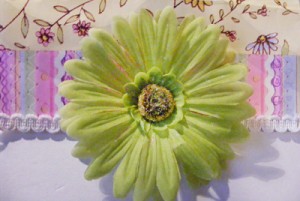
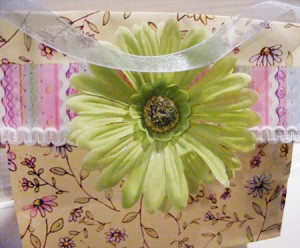
4) Decorate with trim, ribbon or border stickers for an extra special touch (I used some ribbon trim and a big artificial flower).
5) Cut a 2 inch length of double back foam tape and adhere to inside of flap.
6) Cut ribbon, twine or rope and hot glue onto inside fold of flap to create a handle – leave off if you’re using this for a boy.
7) Fill with treats, peel protective layer of double-sided foam tape and affix to bag.
With these 7 easy steps you too can create a fun, practical and inexpensive way to give gifts or homemade treats.
About the Author:
Sandie lee is owner and creator of SAY…Simply All You Gifts. Her handmade and inexpensive baskets, bags and boxed gift containers can be made-to-order and are all one-of-a-kind; never duplicated, never copied. Check out SAY on the web at: SayGifts.net
Guest Post How-to: Prepare and Paint on Canvas
Painting on canvas is not as simple as purchasing the first canvas you find and painting whatever you like on it. You must prepare your canvas before you paint. Before you paint, you must choose the appropriate product for painting based on the sort of paintings you want to produce.
Following some simple steps will help you to prepare the canvas properly and allow you to purchase the paints that will work best for you.
1. You must purchase a canvas that is the size you need. Only you can determine the perfectly-sized canvas for your current project. However, you have to take greater measures after purchasing the right canvas.
2. Any canvas that you purchase will likely have a coat or two of gesso already applied. Gesso allows for a good painting surface for just about any project. You will need to get a good acrylic gesso that you will apply to the canvas with a cake icing knife or similar spate. It will take a few coats to get a perfectly smooth surface to paint on.
3. When you are ready to paint, you should begin by drawing light sketches onto the canvas. You are not, by any means, painting by numbers but you are certainly giving yourself a template to work with.
4. Choose the paint that is going to work best for the painting you want to do. You have to decide whether you’re painting still-life like people and buildings or nature scenes like tress and waterfalls.
5. Still-life paintings that involve people and structures are best painted with acrylic paints. The paints go on pretty strong and they allow for strongly-defined lines for the buildings, furniture, and bodies in each picture.
6. Watercolors and oils work better for paintings that involve nature scenes involving water or trees and bushes.
7. The final step in painting on any canvas is patience. You have spent the time to gesso the canvas and assure that there is a smooth surface. You worked to draw on the picture as best you could so that you would have a template to paint over. Then, you must put as much time into actually painting the canvas as you can. Do not attempt to paint the entire picture all at once. The finest artists in the world spend as much as they need to produce quality work.
Take your time and allow the painting to grow organically. You may change your mind as you paint, and you don’t want all that you’ve invested in the canvas and paints to go to waste. With a little bit of patience, you can produce paintings that art galleries will want to show and people will want to buy.
Author Bio:
Rachel is an arts and crafts lover, creating many of her own pieces for sale at her local market each Sunday morning. One of her secrets for canvas painting is to use exterior paint that is used on houses as it provides a weather-proof and strong solution for large pieces that may come in contact with naughty children or crazy pets!
Guest Post: How to Use Digital Fabric Printing In Your Home
Fashion and designing in the 21st century has moved to new levels. Decorating has taken a great turn and everything that can be used is bringing home décor to exciting and created levels. From the dumpsters to the resale and antique shops to furniture stores, items are being purchased and used strategically to beautify homes that would never have been thought of.
Now since the age of automation, everything has become digital including digital fabric designing. Individuals are not limited anymore to going and buying fabric that is pre-printed with someone else’s designs, but can now create their own and have it printed directly on the fabric of choice. In addition, they have privy to their own colors and can make the designs as personal or impersonal as they want them to be.
The application of various colors in diverse designs on fabric using inkjet technology has become one of the fastest growing textile printing methods on the market. The technique is changing the look of decoration in residential and commercial structures with its many personal touches. New ideas are being birth and discussed further on in the reading.
Curtains
Your personal touch added to window treatment will make a great statement. Whether it is curtains, shutters, or blinds, colors and designs can be matched cohesively rendering a look that is aesthetically stunning.
Bedding
Nothing could be more exciting and brought to life for any bedroom in the home than a representation of some memorable event that can be reconstructed in the form of digital fabric printing. Bedding sets that include window treatment, comforter, sheets, pillowcases, shams and whatever other additions that is desired can be the most creative and welcoming idea that one can initiate. Whether it is a child’s room, a guest room, or the master bedroom, with the application of fresh colors and personalize prints, the perfect bedding set can be designed.
Wall Covering
Many designers are now using fabric as wall covering. A boring room can be given a fresh and new look. Take advantage of this process by adding texture and pattern to your walls with your favorite design and colors.
Furniture
Need an old sofa, chair, pillow, ottoman, or even a dresser covered, using a piece of fabric that has been digitally printed can be a fun and created way to get it done. Decide on the color, design, and the application mode that will be used and you are on your way to producing a piece of family history that will be special and enjoyed in the many years to come.
Digital Art
Become an artist in your own rights. Show off a lovely piece of art whether it is abstract, realist, or folk art, and bring your creativity to life with a designed piece of fabric as the main focus. Digital fabric printing can take a small stroke of amateurism and bring it to a level of genus with a bold presentation. It will look like a piece of artwork that has been worked on for weeks when seen in the final presentation stage and framed.
Alicia is a graphic design and interior decorating student, hoping to combine the two to create modern interior design concepts by utilising tools such as digital printing, design software and homewares.
Guest Post: A Magicians Creative Process
I’m a professional magician and my job is to make the impossible look easy. When I perform people often ask me about the creative process for creating a brand new magic trick and although you guys may not be magicians I think there are some lessons for others in the process I go through.
I always carry a notebook to scribble ideas in. I have a smartphone and could use the notes function but I don’t seem to be able to “creatively freewheel” when I am typing. A notepad is meant be messy and it also allows me to flick through the book so old ideas can be built on easily. A smartphone is a great tool but I much prefer to go old school when developing ideas.
I don’t start looking for new magic routines, I’m always looking for possible ideas and the germ of an idea can come from any aspect of life. A lot of my magic stems from pop culture like music, movies and celeb culture so this is the easy bit. I watch and enjoy all these things as I would do normally and once in a while the flicker of an idea will come.
For example recently I was being unproductive on facebook and the hit movie The Social Network was in the back of my mind. I made the small but essential creative leap that maybe, in my twisted world, the “first facebook” was really a book of faces with hand drawn information and curving arrows could be the links between different people. This sounded like a fun prop but it wasn’t enough so I made a note in my notebook and a note in my smartphone to look at this in one month.
A magic trick comes in two parts, method and presentation and my constant focus is to produce creative solutions to both. Obviously a magician never reveals his secret but I will tell you that magicians have been creating magic tricks for thousands of years and there are hundreds of books on the subject. It’s important to be well read on any subject you wish to be creative in. We are all standing on the shoulders of giants in our respective industries so use that knowledge.
I don’t force the creative process. Once I have made a note of idea and brain stormed for a few minutes I will leave it. I always come up with my best ideas when I am trying to fall asleep so if you can’t solve a problem then head to bed 30 minutes early and as you lie there trying to drift off the unconscious brain will be working overtime trying to help. This is where it’s essential to always have a notepad by your bed as you have no idea when inspiration will come to the fore and I guarantee you’ll have forgotten in the morning.
If you want to be creative you must always be thinking. Every sight, sound, moment of the day can be a solution so keep your eyes open and always be thinking, creativity doesn’t live in a vacuum so get out there and do things, let your mind wander. The more you practice trying to be creative the more successful you will be. Everybody has a creative mind it’s just in some people it’s an underused muscle and needs to be retrained.
Hopefully this gives you an idea of the creative process of magicians and gives you some ideas you can use yourself for thinking creatively.
About the Author
Noel Qualter is a very experienced magician Surrey and magician Hampshire but performs throughout the UK at parties, weddings and events.
One Good Thing a Day – Project Day 79 – Autumn Colours
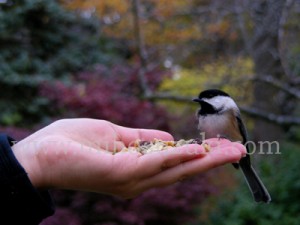
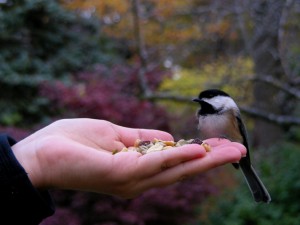
Sorry this is late but here are some photos showing you the beautiful Autumn colours that I absolutely adore!
One Good Thing A Day – Project Day 78 – Nature Contrast
- Tokyo and Toronto
By now everyone should know that nature is not so abundant in Tokyo as it is in Toronto. One of the main reasons for this is the fact that Toronto has about one sixth the population that Tokyo does and Toronto in general offers more living space per person than Tokyo does.
While I have posted some nature photos from Tokyo in the past, it’s certainly not the same.
Here are some from Toronto:
Thank You!
Thank you for The Tokyo Fashion Guide support link market!
We really appreciate it!
For those of you still unaware of what this support is for, check out this post.
How-to Guest Post: Jellyfish in a Bottle
Great simple project for preschool and older. Love the simplisity and beauty of the end result.
This post is from Neltje Maynez showing us how to make Jellyfish in a Bottle:
It was a rainy day last week, and my kids were going absolutely crazy. They had the day off from school, but they couldn’t go outside. They were stuck in the constraints of the house. I was going out of my mind as well. It’s been a long time since I have had my kids in the house. I knew I had to find something for them to do—if I didn’t—we would all be in trouble. That’s when I was excited to start a project that I wanted to do: jellyfish in a bottle!
And, I had everything that I needed to make it at home! If you are having a rainy day with the kids, try this project!
What you need:
1. A transparent plastic grocery bag
2. Plastic water bottles.
3. Thread
4. Food coloring—preferably blue
5. Scissors
Procedure:
First, get your kids to flatten the plastic bags that they want to use as the “jellyfish”.
Second, cut the sides of the plastic bag so that the bag is split into 2 sheets. You will end up only using one of the sheets.
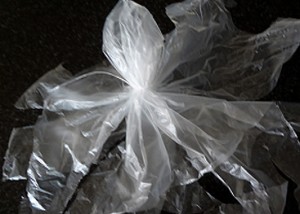
Third, fold the center of the plastic bag, almost like a tiny balloon so that you can make the head part of the jellyfish. After you make the head, tie it with the thread. Don’t tie it too tight. If you have really little ones, you can help them with this step.
Once you have the head part, the rest of the “jellyfish” are the tentacles. You will have just about 7-10 tentacles.
Help the kids trip the tentacles. Make sure that you have a different length for the tentacles.
Now you are ready to put the jellyfish in the water!
Put some water in the jellyfishes head—it will help it sink into your bottle. (But make sure not to fill the head all the way—it needs to be able to float to the top)
Then fill up your water bottle, then about 2 drops of food coloring!
Your kids now have a jellyfish in a bottle. (And you just bought yourself about 2 hours of quiet time).
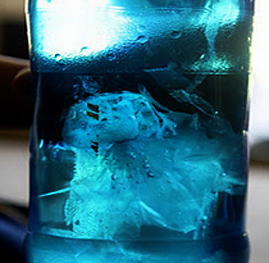
This is the finished product:
Thank you to Neltje Maynez from mycollegesandcareers.com for the great post!
Breaded Eggplant Goodness
Eggplants are an excellent source of dietary fiber, potassium, manganese, folate and magnesium. You can enjoy them in many different ways and I always try to find new recipes to enjoy.
If you’re like me and you don’t like large eggplants with those bitter seeds, here’s a great simple recipe that anyone can use for their eggplants.
Ingredients:
o 1 – 2 large eggplant
o 2 eggs
o 1 – 2 cups oil.
o 1 chicken bouillon cube
o black pepper
o 1.5 cups white flour
o 1 – 1.5 cup breadcrumbs
o optional: paprika
Procedure
Fill one plate with flour.
On another plate, crush 3/4 of the bouillon cube, add pepper and mix well with the breadcrumbs.
Beat the eggs in a bowl or plate with a portion of the crushed bouillon cube.
Wash and slice eggplant (approximately 3cm thickness).
Lightly coat in flour and dust off the excess.
Dip sliced pieces in egg mixture and let the excess dip off.
Coat the slices with breadcrumbs and set aside.
Heat oil in a pan on high.
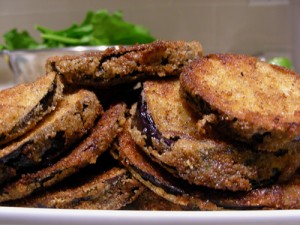
Fry until golden and place on towels to absorb excess oil.
Enjoy!
One Good Thing A Day – Project Day 77 – Great Posts from Great People
November is going to be guest post month. I’ll include some of my own thoughts, recipes and DIY ideas but would also like to share other ideas from great bloggers as well.
Send in your favourite craft ideas or DIY projects to share with the community!
FYI: December will be charity month, so send in your top charitable organizations so I can share their profile with others.
Since this one is running right now, I would like to bring up Movember, which is a great organization to help men with prostate cancer. If you would like to take part in this fun and helpful event, check out: Movember.com


