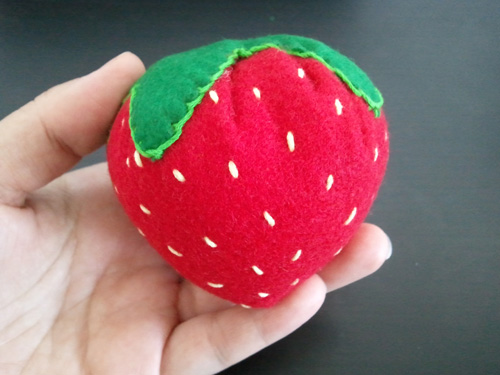
How to Make a Giant Felt Strawberry
I previously posted a felt project that I’m working on. It’s a special gift and I hope it works out.
I had quite a few people ask me how I made the felt strawberry shown in the post. The ones I’m currently making are more or less real strawberry sizes, but for this tutorial, I will show you how to make big strawberries!
You will need:

- 1 large piece of red felt
- 1 medium piece of green felt
- Embroidery needle
- 2-3 skeins red and green embroidery floss (you may need more for extra large strawberries)
- 1 skein mint or yellow embroidery floss (you can also use red, black or cream floss)
- A generous amount of toy/pillow stuffing
How to Make the Felt Strawberries
Start off with a large piece of red felt (the bigger your piece of felt, the bigger your strawberry will be). Next, you need to cut out a shape like this:

Now take your green felt and cut out a shape like this:

Cut out the pieces and set the green piece aside. Take your mint/yellow embroidery floss and thread it through the needle. Sew on the achenes (these are the seed-looking things on the outer part of strawberries) in a random pattern.

Fold over the red felt, so the inside is facing out. Sew along the seam, leaving the top open.


Sew a running stitch along the top edge of the strawberry, making sure to only use one thread (you’ll have to pull it taut in a moment). Do not tie it off, just leave it loose with the needle still attached.

Stuff the strawberry until you get a desired plumpness and pull the thread taut. You should stuff it until you’re still able to pull the top parts shut.

Place your green cutout on top and secure it with a blanket stitch.

There you go! A simple giant felt strawberry!
If you would like me to show off your felt creations, please send me a message here.


