How to Make Mini Gift Boxes from Tissue Boxes
I, as most crafters, don’t like to throw most things away since they can “come in handy one day”. As you can see, tissue boxes are one of those things that I chose to keep for….something.
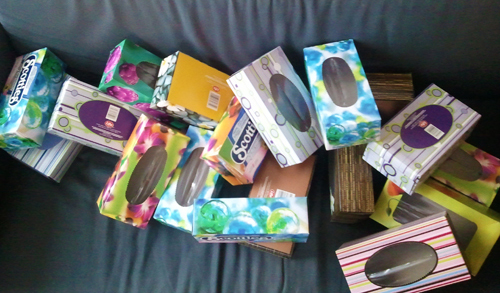
First, take a box and cut out the top.
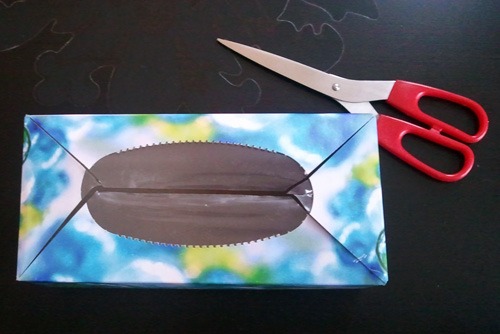
Measure the height of the box and mark the same length in the middle of the box (you’ll have to measure with the ruler and possibly do a little math to get the middle). Cut down until you get to the bottom of the box.
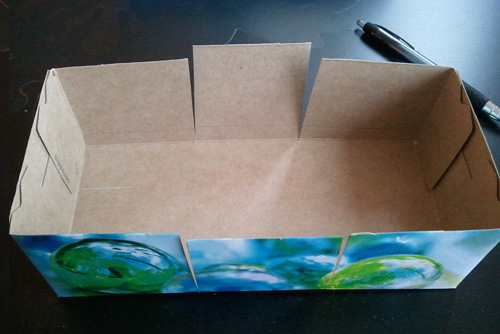
Fold in the two flaps.
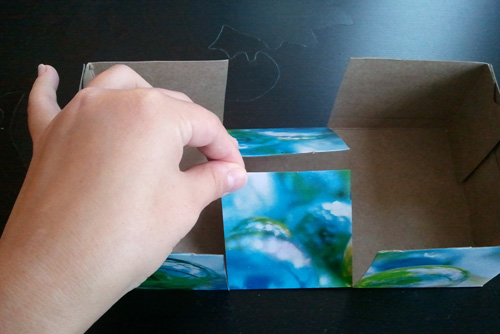
Tuck the flaps into one side of the box.
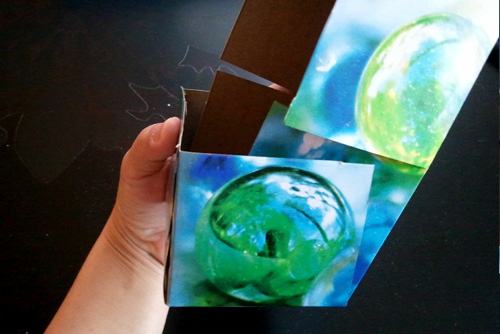
Tuck in the opposite side in as well.
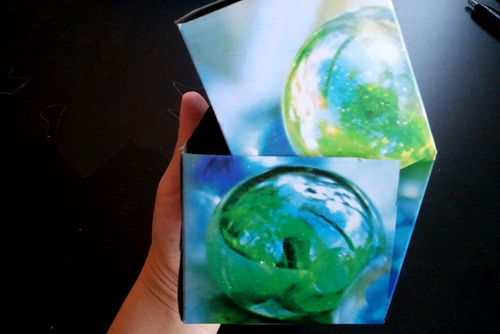
Secure with a ribbon or wrap with wrapping paper.
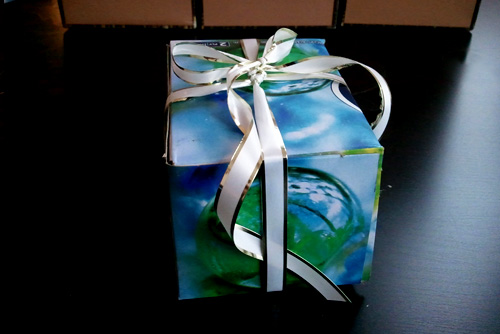
Here is a sample of a finished gift box. It measures approximately 10.5cm x 7.75cm x 6.5cm.
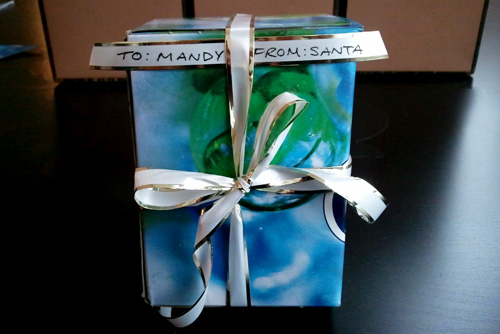
I made a few for smaller gifts. They were perfect to send in a smaller than usual parcel overseas.
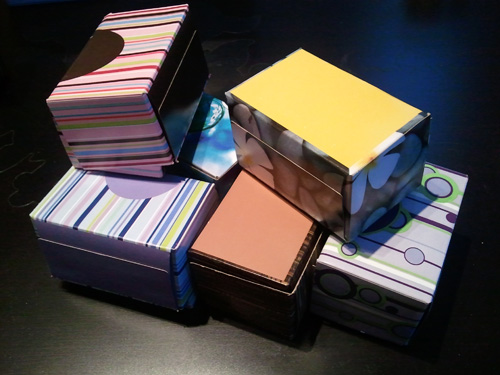
What do you think about the boxes? Have you made anything else from tissue boxes? Comment below to give others a great idea for reusing tissue boxes.
How to Find Free Crafting Materials at Home – Garden
Garden
Gardens have tons of fresh materials that you can use as is, dry or preserve for beautiful crafts. Each season will have a lot of different items to choose from. This not only helps you save money on crafting materials but also help you save money on beautiful home and party decorations!
Ideas:
- Here is a post to make a fresh succulent wreath from Prudent Baby.
- Make decorative leaf masks (find out how at Martha Stewart).
- Preserve leaves or flowers with wax or even ModPodge. String them up for lovely home decor.
- Make pressed flower stationery. Find out how to do it here.
- Wrap dried, fresh or preserved flowers/leaves/twigs around vases and jars for beautiful candle table decorations.
How to – Stained “Glass” Craft for Kids
There are many different ways to recycle plastic packaging that would otherwise get thrown into the trash. Plastic packages are actually very useful around the home. You can flatten them out as a drop sheet, protect tables or flooring from messy projects, place them on the ground to prevent grass stains while working in the garden or use them in craft projects.
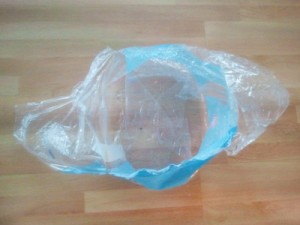
Here is a lovely and simple project to make faux stained glass. It’s a fun craft for children and there’s no worry of broken glass in the end.
You will need:
- plastic packaging
- colourful cardboard paper
- markers or colourful pens
- scissors
- hole punch
- double-sided tape or glue
- string ribbon
- optional: stickers
First, you will need to cut the plastic into manageable pieces. I cut out all of the clear pieces that didn’t have writing or graphics. You are welcome to use those pieces as well to give the stained glass a look of texture.
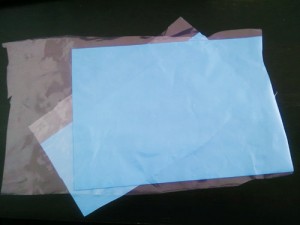
Next, draw different shapes on the cardboard. Ask the children to draw any shape -squares, hearts, triangles and so on. Once they are done, either have the children cut out the shapes or help them along with it. The next step to complete the main “frame” is to cut out different objects or words within the main shape. *These will then have to be cut out with care to avoid cutting the edges*
Whatever these inner shapes are, they will be the ones to be illuminated by the sun.
Once that step is complete, place the newly cut pieces on the plastic to see how it will look in the end:
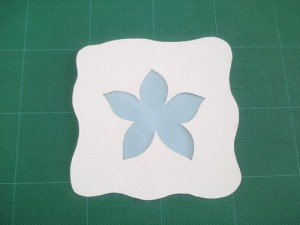
Secure the plastic to the back and cut off any pieces that may stick out from the edges. Punch a hole at the top, tie off a string or some ribbon and you are ready to hang it anywhere you please.
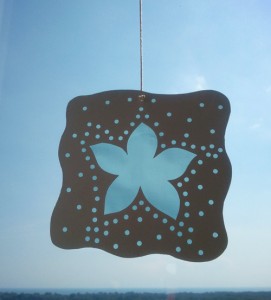
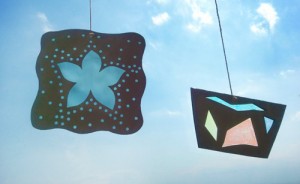
This one had clear plastic as the backing, but you can easily have the children colour it in with markers or pens:

How to Find Free Crafting Materials at Home – Basement, Garage and Attic
Basement, Garage and Attic
These three places of the home are generally treated like an endless pit… which is probably why they get stuffed with everything under the sun. They are the home for the long lost and long forgotten items that we just can’t seem to find -ever.
Take one weekend to clear out these rooms and finally get rid of the unnecessary clutter. You may be surprised at what you might find.
As a general rule when clearing out these massive spaces, sort everything into piles under:
Keep – Items you really truly need on a daily basis or even for a particular season.
Donate – Items you don’t really need or want anymore. These items should be in good condition and clean.
Crafting/Repurpose Materials – Items that are perhaps not needed and are not in the best condition for donating… but there is still some use for them in one form or another.
Recycle or Freecycle – Any items that are no longer useful and are unable to be donated or used as a DIY project. Check for freecycle groups in your city. You never know, someone may take some of stuff for free, making your recycling job easier!
Trash – These are the items that have definitely seen their last day. Items that are broken, moldy, or falling to bits.
Ideas:
- Turn furniture into play areas. Check out these tutorials to make a children’s play kitchen out of an old TV cabinet.
- Make beautiful (and simple) decorative containers like these from the Gilded Hare.
- Make incredible toys and playhouses from regular boxes.
- Decorate old lampshades with fabric flowers for a new look. See an example here.
- Take old furniture, sand it down and repaint in a bright solid colour. They instantly look modern and new!
How to Find Free Crafting Materials at Home – Play Room
Play Room
Ah, the play room. So many items that find their way into this room and so many forgotten toys just collecting dust. This room is perhaps one of the best for finding crafting materials that can be used for fun, create new toys for the children or even to make DIY gifts for others.
For those items that are still clean and in good condition, consider donating them before using them for crafts. There are many children out there who are not as fortunate and they will surely love a “new” toy to play with.

Ideas:
- Make planters out of old plastic toys. Check out this great tutorial from The Thrillz of Hillz.
- Stick on some magnetic strips to the back of the toys for some fun magnets.
- Arrange small toys on an old picture frame for a fun way to show off children’s work of art.
- Arrange and hang up old toys to make a fun canopy.
- Make interesting bookends for the children or adults! Check out the tutorial at Mad in Crafts.
How to Find Free Crafting Materials at Home – Bathroom
The bathroom is an unlikely space to have free crafting materials, but if you use your imagination, it’s quite possible to find a lot of great things.
The main sources will generally be product packaging. Think about used up body lotion bottles, bottles or boxes for refills, facial soaps and creams and so on. While you can certainly recycle these items, they can also be turned into useful items around the home.
Other items that can usually be found are random elastics, ribbons, plastic caps, old towels, shower curtains, fabric, toilet paper rolls and more.
Ideas:
- Create toilet paper roll rockets or beautiful toilet paper roll wreaths and wall art (yes, it can be beautiful!)
- Make multi-purpose holder from old soap/lotion bottles. Here is one great tutorial from make it and love it.
- Make an outdoor quilt with old towels.
- Cut the tops off old plastic bottles, paint or cover with decorative fabric for fun vases.
- Create a fun indoor/outdoor canopy from old shower curtains. You can find great canopy ideas from Apartment Therapy.


