Fabric Embellishments for Greeting Cards
For those of us who always seem to have scrap fabric around, there are many different options to use these scraps, no matter how small they may be. One of the best and easiest crafts is to make cute greeting card embellishments. Regardless of the amount and size of fabric you have available, there are endless things you can do with them:
Cute Bow
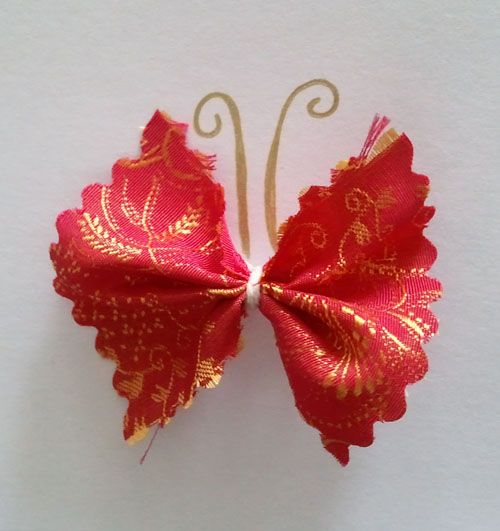
A bow is simple, cute, and can be combined with other things for any occasion throughout the year. The first thing is to cut out a large rectangle or smaller rectangles from the fabric. Set any leftovers aside for extra decoration later. Next, fold the fabric accordion style, pinch and secure the middle. You can use staples, twist ties, thin ribbon, clear tape or make a small stitch to keep all of the pleats together. Finally, attach it to the card with hot glue, double sided tape or another stitch through the paper and bow. Now, you are free to add any other details that you would like. Create a present with the bow on top, draw a tree with bow decorations, add it as a hair tie for a little girl, on a kite string, balloon, make a butterfly and so on… there are hundreds of things you can do!
Shapes and Textures
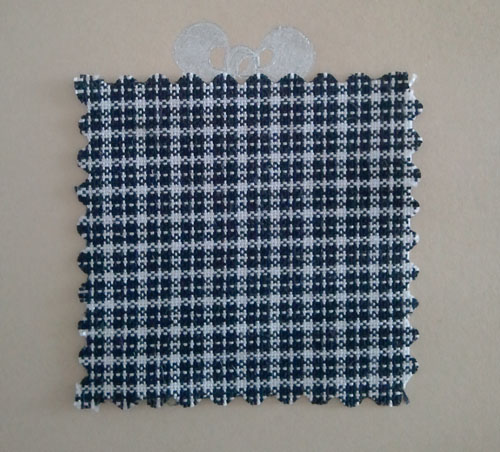
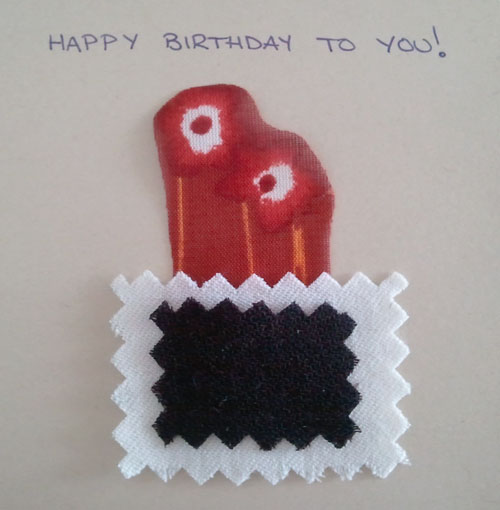
Fabrics come in a wide range of textures and can generally be cut into any shape imaginable, so why not get creative and cut out rough shapes and arrange them as a collage, a puzzle or add one larger shape to frame or layer another decorative piece. No matter how plain a card may seem at first, just adding one single piece of fabric with some decorative touches using a metallic pen, a card will instantly have depth and visual appeal. One simple example is to cut out a few squares and rectangles, arrange them around the card (front and back) then quickly draw in a little bow above each shape. These instantly look like wrapped gifts, making them the ideal handmade card for Birthdays Anniversaries and holidays like Christmas.
Extras
Other great extras that can add depth to a card and help create a fun unique card is to add little decorative items like sticker, buttons, pins brooches and so on. Look through old jewellery boxes or old junk drawers to see what can be used. It’s incredible the amount of crafting materials we can find when looking through forgotten drawers and boxes around the house!
As I always say, play around with the fabric and get creative with what you have on hand. Try to get inspiration from sites online or try to create something unique. Not only will you make something from the heart but you will also help out the environment by keeping items out of the trash!
Finding More Space for Crafting
If you are a serious crafter you might find that your projects often invade your entire house. The dining room table has such a temptingly large and flat surface that it is hard not to start craft projects on it. I have to constantly battle to keep my crafts out of my living spaces. Some projects, such as those involving paper or cards, are easy to pack up midway through completion and put away. Others, such as painting projects, are a bit more complex and require drying time and cannot be easily packed up and moved aside. If you are constantly finding yourself struggling to find the space for your crafts and daily activities you might need to create a separate space for your crafting.
If you are lucky enough to have a spare room or corner that you can turn into your crafting kingdom then you are set. If not, you may want to consider turning your garden shed into a crafting space. Depending on the types of crafts you do, you will need different types of tools and storage. However, most crafts can be accommodated by a good table and lots of shelves for various boxes and tools.
If you are content with sharing your garden shed with gardening tools you may be surprised at how much room you can make for your crafting with just a bit of tidying. Neatly organizing and putting away all your tools will save space. A peg board can help you hang up your gardening and crafting tools where they are accessible and easy to spot. You can turn one half of your shed into your crafting space. I do a lot of crafts involving dollhouse miniatures and do not require much table space. Though, on occasion, I embark on larger projects that demand more space. If you know that your crafts will need more space than half the shed, you can pack the gardening tools off to the garage or a small closet somewhere and take over the whole space.
Now that you have made some space you need to bring in the right table. The right type of table depends ultimately upon what crafts you will be doing. Just make sure it is sturdy enough for all the projects it will soon be holding. Having tables of different heights may be advantageous for long crafting sessions. If you have one that is suitable for working while seated you might consider making your second table tall enough to work at standing. Tables that are roughly chest high would allow you to do detailed work without hunching over and hurting your back or straining your eyes.
If your shed has sturdy rafters you could even try rigging your table up on pulleys to give you various table height options. If you do attempt this I would suggest using pegs against the wall to hold your table study at various heights. The benefit of this method is that you can raise the table completely out of the way for more floor space when necessary.
Light is essential for crafting. Make sure the place you put your work table has good light. Placing your work area under a window will give you lovely natural light to work with. You will also need to consider electric lighting if you do your crafting at night.
One advantage of crafting in a garden shed is that you do not need to worry about being overly cautious. Garden sheds are meant to hold up to a little dirt and a little glue won’t hurt them either. You can tackle painting projects without fear of permanently colouring your furniture or walls. A little creative mess won’t be in the way here. It will even be inspiring. If you’re sharing your space with the gardening tools you could even be inspired by the scene to draw or paint it. Or perhaps more practically, you could find yourself inspired to do a bit more work in your garden too.
Now that the garden shed is your crafting space you can completely embrace your creativity here. Read your favourite stories out here. Paint the walls in fun colours. Feel free to repaint them whenever it strikes your fancy. There is something delightfully sinful about doodling on walls. You can write out your favourite sayings to inspire you or make you think. Now you can start a project without fear of having to move it for dinner. Be free and inspired to create.

The original source of the image is http://www.flickr.com/photos/craigsd/4687453830/
This is a guest post written by Melinda Wilson on behalf of Tiger Log Cabins, a manufacturer of high quality garden log cabins.
Fun and Easy Magic Tricks to Teach Your Kids
Adults and children alike can be astounded and amazed by magic tricks, or really, the art of illusion and misdirection. And many a child has been so mesmerized by the art of magic that they’ve embarked on a path to learn and perform the very illusions that so stymied them. As a parent you are probably happy to support your kids in all of their endeavors, and whether you have dabbled in this type of trickery yourself or you’re as new to the game as your progeny, you may be looking for a few fun and easy tricks to teach your kids. So here are a couple of simple ones to start out with.
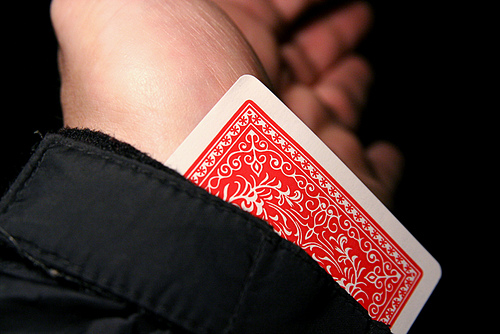
Most tricks involve props of some sort, but before you make a beeline for a deck of cards, consider some of the incredible feats you can pull off with nothing more than the change in your pocket. Coin tricks can be hard for young hands to manage since most require advanced motor skills and dexterity, but you can definitely do some cool tricks with a dollar bill. For example, you can hold a dollar bill face-forward (presenting the president to your audience). Fold it in half by bending the top of the bill forward and down. Then fold it in half again by taking the right corner forward and to the left. Next, you will unfold the bill by taking the left corner back (towards you) and to the right, and then taking the bottom flap forward (towards the audience) and up. When you’re finished, George Washington will have flipped upside down.
This simple trick is easy enough for even small children to memorize and it will take viewers a minute to figure out that you didn’t unfold it the same way you folded it. Like any type of illusion, you can further confuse the audience by adding some panache to the performance (some witty banter or flashy hand movements) to draw their attention away from the trick. In truth, misdirection is half of any good trick since it keeps the audience from paying too much attention and catching the mechanics of your “magic” illusion.
If your child is a bit older and ready for something more complex, try sawing an assistant in half. Whoa, what? Okay, you don’t actually need a saw or even an assistant to recreate this trick. All you need is a piece of paper, scissors, and a sealed envelope. Start by cutting the ends off the envelope and cutting a strip of paper (like bookmark size) that will fit in the envelope (which is now a tube). Draw a picture of your lovely assistant on the paper so that her feet and head stick out when you insert the paper into the envelope. Now, cut a slit parallel to each end of the envelope on the underside (two slits total), leaving the topside undamaged.
When you do the trick, you will insert the paper doll into one open end of the envelope, but then weave her through the slits on the underside so that her whole middle section is on the outside of the envelope (underneath where the audience can’t see). Then “saw” her in half by using scissors to cut through the envelope (but not the doll – make sure the bottom scissor blade goes between the doll and the envelope). Next you’ll remove the whole assistant from the cut box with a flourish.
You don’t have to be a professional magician in order to teach your kids a few clever tricks. But you will probably want to watch some instructional videos online and master them yourself before you try to train your kids. After all, they won’t be very impressed with any illusion you fumble. And since you’re trying to support their dreams of becoming the next David Copperfield it pays to put some effort into the process.
Sarah Danielson is a contributing writer for Noel Qualter – Anchor Magician Kent, a popular table magician based in the UK.
Living Green, Day in and Day Out
Living a green lifestyle is easier than you may think. You can conserve, reuse and recycle everyday items to make the world a more Eco-friendly place to live. If everyone plays their small part, big differences can be made. Living a greener lifestyle has many added benefits in addition to preserving the planet, such as saving you money and improving your health. Try some of these easy ideas to get you started on a greener way of life.
Items That Can Be Reused:
Old or antique bricks and stones can be reused as a garden path or as the edging of a garden. Older stone and brick are colorful and add to the rustic beauty of the outdoors. You will save money and the environment by reusing natural resources.
Plastic store bags can accumulate very quickly. Do not throw them away. You can reuse the bags for small trash cans or take them back to the store for reuse. Some stores even offer recycling of used bags. You could also donate the bags to thrift stores or day care centers.
Furniture and light fixtures can be reused or re-purposed. There are plenty of antique stores, thrift stores and flea markets that you can explore. Not only can you purchase used furniture, you can donate it too. Most of the time antique furniture is better made than newer furniture.
Recycle items such as cell phones, computers, and even eyeglasses. There are some opticians that donate refurbished frames to the needy. Cell phones can be used in shelters because they still dial 911 even when they are no longer in service.
Ways to Conserve:
Rent or borrow items rather than buying. Some things you only need occasionally. Why purchase items that will just sit in your garage or shed? You can rent tools, smart phones, technological devices, party supplies, textbooks or any book for that matter, exercise equipment, camping gear and even a casket.
Conserve energy consumption. This will help your wallet as well as the environment. Adjust your thermostat slightly lower in the winter and higher in the summer. Unplug things that are not in use. Wash your laundry in cold water. Use a low-flow shower head and reduce your overall water consumption.
Ride your bike or walk to save gas money and to reduce chemical emissions. You can also carpool or use public transportation.
Buy a reusable water bottle instead of buying bottled water.

About the Author
Jan Camilo writes for www.brickpavers.org and has been a blogger for 2 years. She loves to find new ways to conserve energy throughout her daily life and tell others about green living and news.
Buying Local Year-Round
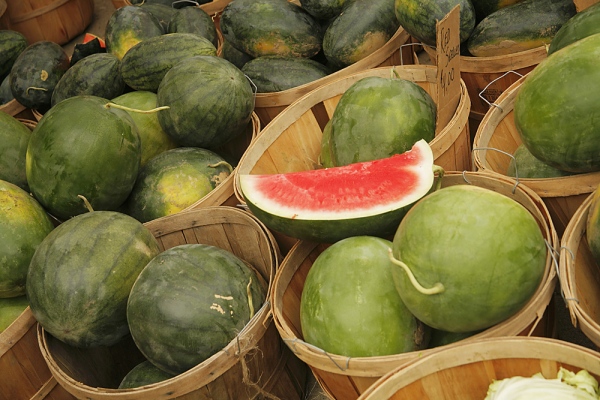
If you’re the kind of person who likes to sustain yourself on fresh, local produce, then spring, summer, and fall are pretty much no-brainers. This is when produce is plentiful, and you can take advantage of things like farmer’s markets where you can easily get great local ingredients. Even tending your own garden is much more doable in the spring and summer!
Even though we are just getting into the summer months, it’s wise to use this time with an abundance of fresh produce and food to start thinking about the fall and winter. You can also stock up on fresh food at other times of the year and find ways to make it last. For example, many ingredients can be purchased in bulk and frozen. If you have a separate freezer, you can really stock up and have enough good food to last until spring comes again. If you’re feeling particularly ambitious, you can actually put some meals together before freezing them, so that you have TV-dinner style meals ready to go on days when you don’t really feel like cooking but don’t want to go out.
You can also get into preserving food, and summer is the perfect time to stock your pantry for the rest of the year. Canning or making jams and jellies is a great idea and can be done in big batches. Whatever you think you won’t use can be given to friends and family as gifts. Dehydrating food is another idea that can make the ingredients you buy last longer. You can make your own trail mix for road trips, dehydrate fruits for snacks, or even make beef jerky! The possibilities are endless.
Just because fresh food is less plentiful in the latter months of the year doesn’t mean you can’t still buy local. All it takes is a little advanced planning, and you’ll be good to go until warmer weather comes around again.
Happy Father’s Day!
Before I was scared of you (strict Japanese father) but I’m happy you were so hard on me because now I’m a better person.
Thank you Tata!


